
PX4 Instructions
Hardware Setup
Wiring
The ARK Flow MR is connected to the CAN bus using a Pixhawk standard 4 pin JST GH cable. For more information, refer to the CAN Wiring instructions.
Mounting
The recommended mounting orientation is with the connectors on the board pointing towards back of vehicle, as shown in the following picture.
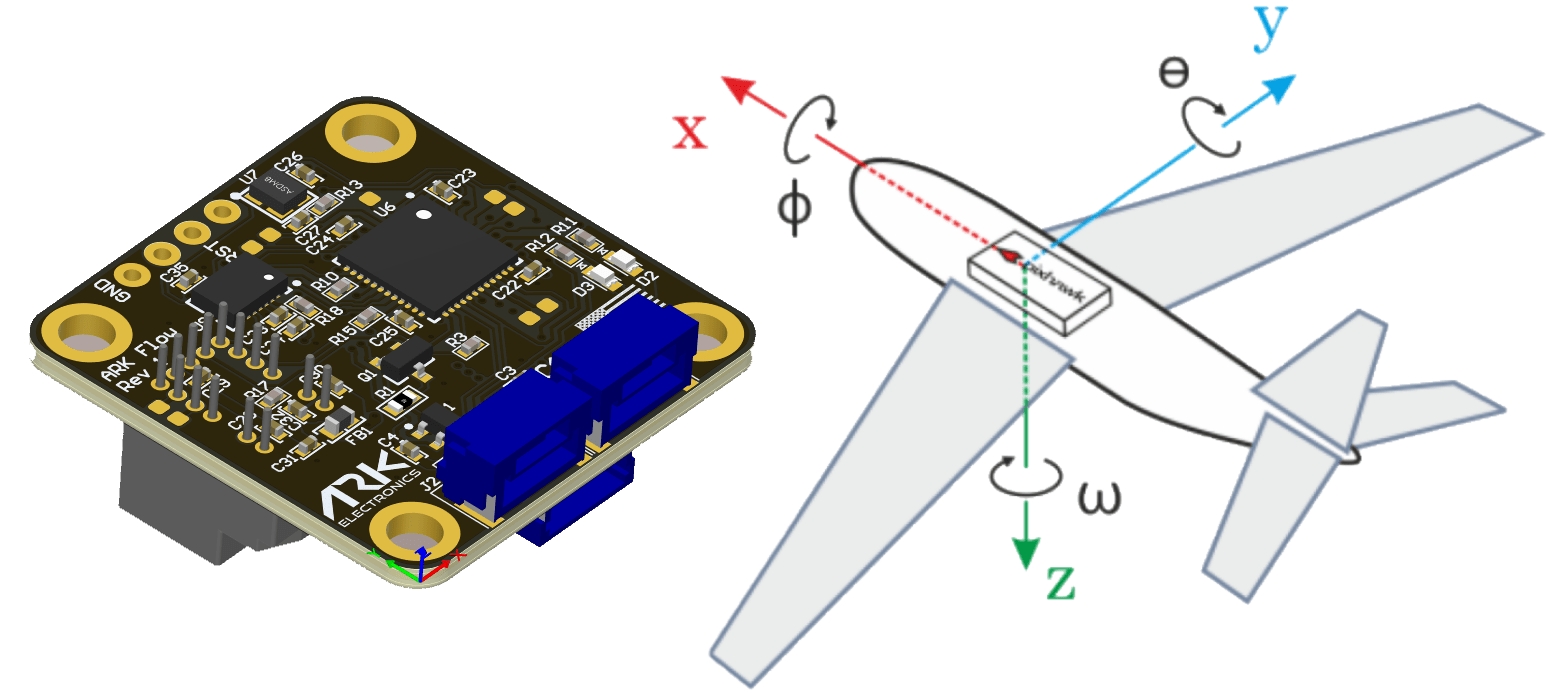
This corresponds to the default value (0) of the parameter SENS_FLOW_ROT. Change the parameter appropriately if using a different orientation.
The sensor can be mounted anywhere on the frame, but you will need to specify the focal point position, relative to vehicle center of gravity, during PX4 configuration.
Firmware Setup
ARK Flow MR runs the PX4 DroneCAN Firmware. As such, it supports firmware update over the CAN bus and dynamic node allocation.
Flight Controller Setup
INFO
The Ark Flow MR will not boot if there is no SD card in the flight controller when powered on.
Enable DroneCAN
In order to use the ARK Flow MR board, connect it to the Pixhawk CAN bus and enable the UAVCAN driver by setting parameter UAVCAN_ENABLE to 2 for dynamic node allocation (or 3 if using DroneCAN ESCs).
The steps are:
In QGroundControl set the parameter UAVCAN_ENABLE to
2or3and reboot (see Finding/Updating Parameters).Connect ARK Flow MR CAN to the Pixhawk CAN.
Once enabled, the module will be detected on boot.
DroneCAN configuration in PX4 is explained in more detail in DroneCAN > Enabling DroneCAN.
PX4 Configuration
You need to set the EKF optical flow parameters to enable fusing optical flow measurements for velocity calculation, set necessary DroneCAN parameters, and define offsets if the sensor is not centred within the vehicle.
Set the following parameters in QGroundControl:
Enable optical flow fusion by setting EKF2_OF_CTRL.
To optionally disable GPS aiding, set EKF2_GPS_CTRL to
0.Enable UAVCAN_SUB_FLOW.
Enable UAVCAN_SUB_RNG.
Set EKF2_RNG_A_HMAX to
10.Set EKF2_RNG_QLTY_T to
0.2.Set UAVCAN_RNG_MIN to
0.08.Set UAVCAN_RNG_MAX to
50.Set SENS_FLOW_MINHGT to
0.08.Set SENS_FLOW_MAXHGT to
25.Set SENS_FLOW_MAXR to
7.4to match the PAW3902 maximum angular flow rate.The parameters EKF2_OF_POS_X, EKF2_OF_POS_Y and EKF2_OF_POS_Z can be set to account for the offset of the Ark Flow from the vehicle centre of gravity.
Ark Flow MR Configuration
On the ARK Flow MR, you may need to configure the following parameters:
CAN built-in bus termination.
Last updated